 Pin It
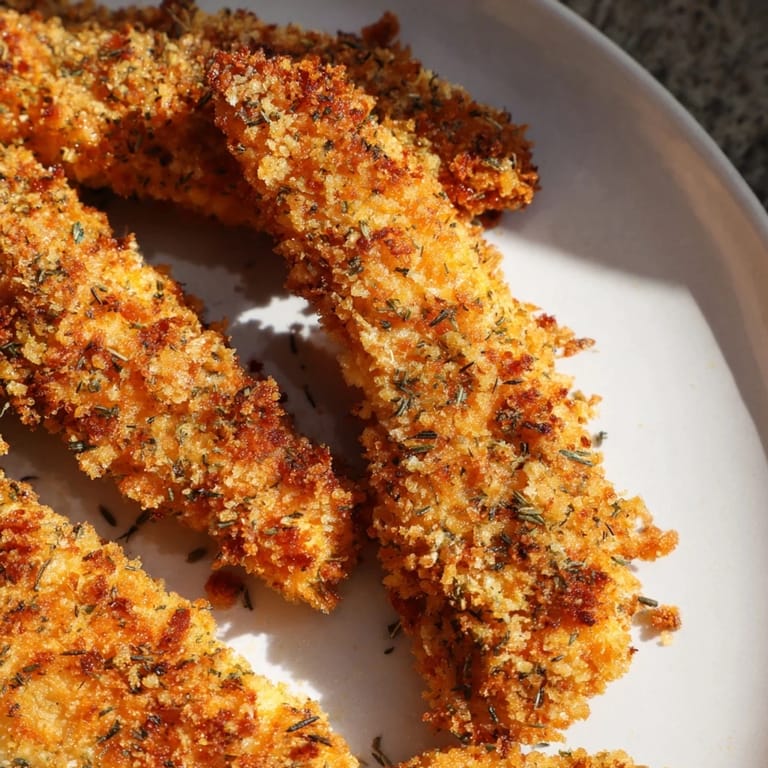
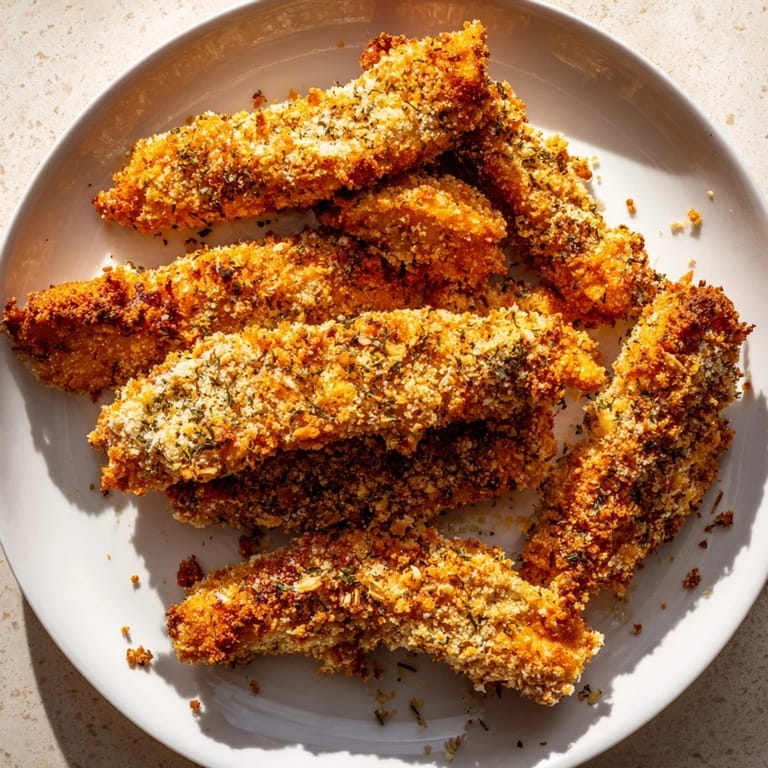
 My sister used to complain that baked chicken always tasted dry and boring, so I set out to prove her wrong one Saturday afternoon. I remembered a trick from a cooking show about mixing mayo into the egg wash to help the coating stick and keep everything juicy. The kitchen filled with the smell of toasted panko and herbs, and when she took her first bite, she just laughed and said, "Okay, you win." Now she asks me to make these strips every time she visits, and I never get tired of that little victory.
I made these for a casual game night once, and they disappeared faster than anything else on the table. People kept asking if I'd ordered them from somewhere, which made me feel like a kitchen wizard. The garlic and smoked paprika give them just enough flavor that they don't need a ton of sauce, but I still put out three different dips because variety is fun. Watching everyone reach for seconds while laughing over cards reminded me why I love cooking for people.
Ingredients
- Boneless, skinless chicken breasts or tenders (500 g): Tenders work best because they're already the right shape, but breasts are easy to slice into even strips that cook at the same rate.
- Salt (1/2 tsp) and black pepper (1/4 tsp): Simple seasoning on the chicken itself ensures every bite has flavor, not just the coating.
- All-purpose flour (100 g): The flour layer helps the egg mixture cling, creating a sturdy base for the panko to grab onto.
- Eggs (2 large): Eggs act as the glue, and beating them well makes the coating process smoother and less clumpy.
- Mayonnaise (2 tbsp): This is the secret to keeping the chicken moist and helping the breading stay put, plus it adds a subtle richness.
- Panko breadcrumbs (120 g): Panko creates those big, airy crumbs that crisp up beautifully in the oven, unlike regular breadcrumbs that can get dense.
- Dried Italian herbs (1 1/2 tsp): A blend of oregano, thyme, and basil brings a familiar, comforting flavor that everyone recognizes and loves.
- Garlic powder (1/2 tsp): Garlic powder distributes evenly through the breading, giving you consistent flavor in every bite without burning like fresh garlic might.
- Smoked paprika (1/2 tsp): This adds a hint of smokiness and a gorgeous golden-red color that makes the strips look even more appetizing.
- Cayenne pepper (1/4 tsp, optional): Just a pinch wakes up the flavors without making things spicy, but you can leave it out if cooking for kids.
- Olive oil (2 tbsp): A light drizzle or spray before baking helps the panko turn golden and crispy, mimicking the effect of frying.
Tired of Takeout? 🥡
Get 10 meals you can make faster than delivery arrives. Seriously.
One email. No spam. Unsubscribe anytime.
Instructions
- Preheat and Prep Your Pan:
- Set your oven to 220°C (425°F) and line a baking sheet with parchment paper, or even better, place a wire rack on top so air circulates all around the strips. This step makes a huge difference in getting that all-over crispiness.
- Prepare the Chicken:
- Pat the chicken completely dry with paper towels, then slice into strips about 2 cm wide, keeping them as uniform as possible so they cook evenly. Season both sides with salt and pepper right on the cutting board.
- Set Up Your Breading Station:
- Grab three shallow bowls and fill the first with flour, the second with eggs whisked together with mayonnaise until smooth, and the third with panko mixed with all the herbs and spices. Having everything lined up makes the process fast and tidy.
- Coat the Chicken:
- Take each strip and dredge it in flour, shaking off any excess, then dip it into the egg mixture, letting the extra drip off. Press it firmly into the panko mixture, turning to coat all sides, and place it on the prepared baking sheet.
- Add the Finishing Touch:
- Once all the strips are coated and arranged on the sheet, drizzle or spray them lightly with olive oil to encourage browning. This little trick is what takes them from good to irresistible.
- Bake Until Golden:
- Slide the pan into the oven and bake for 18 to 22 minutes, flipping the strips halfway through so both sides get crispy. They're done when the coating is deep golden and the internal temperature hits 74°C (165°F).
- Rest Before Serving:
- Let the strips cool on the pan for 2 to 3 minutes before serving. This resting time lets the coating firm up and stay crunchy instead of steaming and getting soggy.
 Pin It
 The first time I served these at a family dinner, my nephew asked if we could have them every week. He's usually picky about anything that isn't pizza, so hearing him ask for seconds felt like a small miracle. Now these strips are my go-to whenever I need something that works for both kids and adults, and I love how they bring everyone to the table without any fuss.
Serving Suggestions
I like to put out a few different dipping sauces because everyone has their favorite. Honey mustard is classic and sweet, ranch is creamy and cooling, and spicy sriracha mayo adds a kick that adults usually love. A simple green salad or roasted vegetables on the side keeps things balanced, and if you're feeding a crowd, these pair perfectly with oven fries or a tangy coleslaw.
Storage and Reheating
Leftovers can be stored in an airtight container in the fridge for up to three days, and they reheat surprisingly well. I always use the oven or an air fryer to bring back the crispiness, heating them at 180°C (350°F) for about 8 minutes until warmed through. Microwaving will make them soft and sad, so it's worth the extra few minutes to do it right.
Customization Ideas
You can easily tweak the seasonings to match your mood or what you have on hand. Sometimes I add grated Parmesan to the panko for a savory, cheesy crust, or swap the Italian herbs for Cajun seasoning when I want something bolder. For a gluten-free version, just use gluten-free panko and flour, and for a lighter option, Greek yogurt works great in place of mayonnaise.
- Try adding lemon zest to the panko for a bright, fresh twist.
- Swap smoked paprika for regular if you prefer a milder flavor.
- Serve with a squeeze of fresh lemon juice right before eating for extra brightness.
 Pin It
 These chicken strips have become one of those recipes I make without thinking, and they always deliver. Whether it's a quiet Tuesday or a house full of friends, they just work.
Recipe FAQs
- → How do I achieve maximum crispiness?
Use a wire rack on your baking sheet instead of parchment paper to allow air circulation underneath the chicken. Lightly drizzle with olive oil rather than coating heavily, and flip halfway through baking at the 9-11 minute mark for even browning.
- → Can I prepare these ahead of time?
Yes, you can bread the chicken strips up to 4 hours ahead and refrigerate on a baking sheet before baking. For longer storage, freeze breaded strips for up to 3 months. Bake directly from frozen, adding 5-7 minutes to cooking time.
- → What's the best way to check if chicken is fully cooked?
Use a meat thermometer to ensure the internal temperature reaches 74°C (165°F) at the thickest part. Alternatively, cut into the largest piece—juices should run clear with no pink visible inside.
- → How can I make this gluten-free?
Replace all-purpose flour with rice flour or cornstarch, and use certified gluten-free panko breadcrumbs. Check your mayonnaise or yogurt labels for hidden gluten. Everything else remains the same in the preparation method.
- → What dipping sauces pair well with these strips?
Try honey mustard for sweetness, classic ranch for creaminess, or spicy sriracha mayo for heat. Garlic aioli, BBQ sauce, and lemon herb yogurt dip also complement the herbed panko coating beautifully.
- → Can I use Greek yogurt instead of mayonnaise?
Absolutely. Greek yogurt creates a lighter coating and adds protein. Use it in equal proportion—2 tbsp Greek yogurt mixed with 2 eggs—for the same binding effect with fewer calories and fat.