Pin It
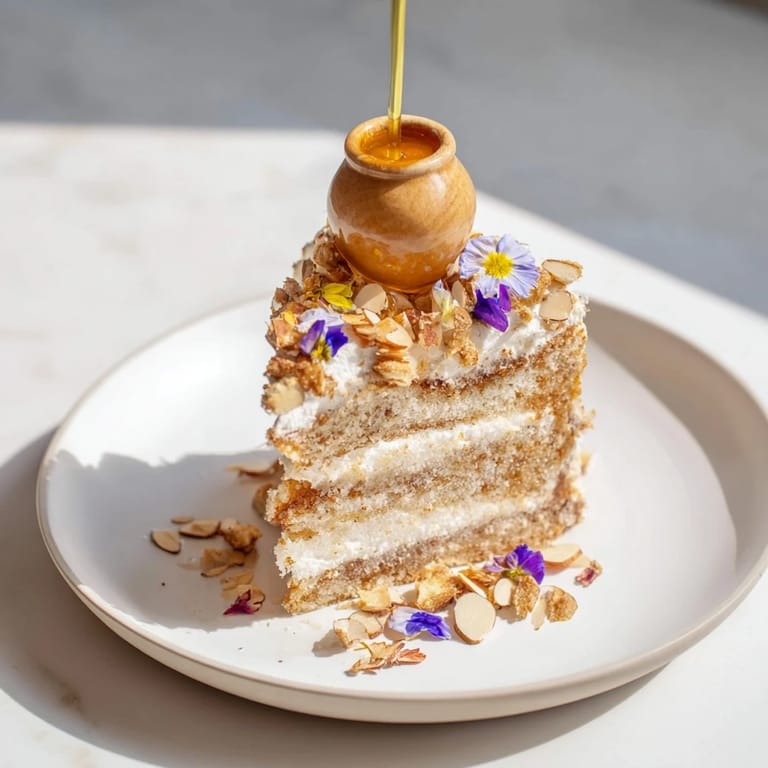
 There's something about honey that makes you slow down. I discovered this cake one autumn afternoon when a friend handed me a jar of wildflower honey from her cousin's hives, still slightly warm, with that golden thickness that catches the light. She said, 'You have to do something special with this,' and I spent the next week obsessing over how to honor it. The idea of building layers around a central pot of warm honey came to me while I was staring at the jar, imagining how it might look on a table when guests leaned in to dip their forks into that golden center.
I made this for a dinner party that almost didn't happen—the forecast called for snow, half the guests cancelled, but then three of us found ourselves around my kitchen counter anyway, laughing about something ridiculous. When I brought out this cake and everyone saw that honey pot in the middle, the energy completely shifted. Suddenly the evening felt intentional, special, like we'd stumbled into something worth celebrating even if the guest list was smaller than planned.
Ingredients
- All-purpose flour: The foundation that keeps everything tender; make sure it's fresh because old flour can make the cake taste a bit flat.
- Baking powder and baking soda: These two work together to give you that perfect crumb, but don't mix them up—they're different chemically and your cake will know the difference.
- Unsalted butter: It needs to be soft, almost room temperature, because that's what gets you the fluffy base you're after.
- Honey: Use the good stuff here—this is your star, so pick a honey you actually enjoy tasting on its own, whether that's wildflower, acacia, or whatever speaks to you.
- Eggs: They bring structure and richness; let them come to room temperature if you can, it makes a difference in how they incorporate.
- Heavy cream and mascarpone: This combination is your secret to a filling that's creamy without being heavy, almost cloud-like when you get it right.
- Edible flowers: Not essential, but they catch the eye and add a delicate detail that makes people pause before eating.
Tired of Takeout? 🥡
Get 10 meals you can make faster than delivery arrives. Seriously.
One email. No spam. Unsubscribe anytime.
Instructions
- Set your stage:
- Preheat your oven to 350°F and get those cake pans ready—grease them well and line the bottoms with parchment. This matters because you're going to be slicing these layers thin, and you want them to release without sticking.
- Build your dry base:
- Whisk flour, baking powder, baking soda, and salt together in a bowl. This is where you're aerating everything and making sure the leavening is evenly distributed throughout.
- Cream the butter and sugar:
- Beat them together until they're pale and fluffy, about 3 minutes—you're essentially trapping air, which is what makes your cake tender. Then add the honey, eggs, and vanilla, beating well each time.
- Marry the wet and dry:
- Add your dry ingredients and milk in alternating batches, starting and ending with the dry. Mix just until combined—overworking this batter will toughen your cake, so stop as soon as you don't see streaks of flour.
- Bake with intention:
- Divide the batter evenly between your pans and bake for 22 to 25 minutes, until a toothpick comes out clean. The kitchen will smell incredible, and you'll know it's done when the tops are golden and spring back slightly when you touch them.
- Cool completely:
- Let these layers cool in the pans, then turn them out onto a rack. Patience here prevents crumbling later.
- Make your honey cream:
- Whip heavy cream to soft peaks, then fold in honey and mascarpone, whipping again until you reach stiff peaks. Chill it while you work on assembly.
- Slice and layer:
- Cut each cake horizontally to create four thin layers total. Place your first layer on a serving platter, spread generously with honey cream, and repeat until everything is stacked.
- Cut the center:
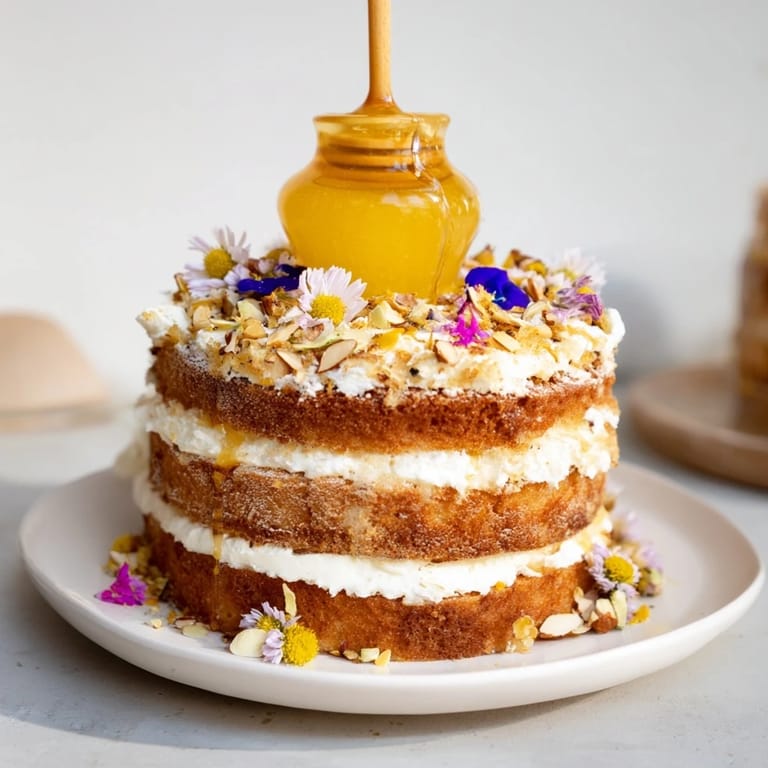
- Using a 3-inch round cutter, carefully cut a hole from the center of your stacked cake—this is the dramatic moment. Place a small glass or ceramic honey pot in the hole and fill it with your best liquid honey.
- Garnish with purpose:
- Top with toasted almonds, edible flowers if you've got them, and a final drizzle of honey. This is your moment to make it yours.
 Pin It
 There's a moment, right before you cut that hole in the center of the cake, when you hesitate—because you're about to destroy something beautiful to make it more beautiful. That's when you know you're doing something right. This cake isn't just about feeding people; it's about giving them a reason to pay attention, to slow down, to experience food as something interactive and memorable.
Choosing Your Honey Wisely
The honey you choose will completely change this cake's personality. I've made it with wildflower honey on a Tuesday and acacia honey on a Saturday, and they're almost different desserts—one feels earthy and complex, the other clean and floral. The quality matters more than the type, though; buy from a local beekeeper if you can, or at least from somewhere you trust. Your guests will taste the difference, and that's the whole point.
The Art of Layering
Slicing those cake layers thin is an exercise in gentleness and patience. I use a serrated bread knife and a steady hand, working slowly around the circumference before making the final cut. Some people use cake levelers or thread, and honestly, whatever method keeps your layers even works. The filling is forgiving enough that minor imperfections disappear once the honey cream spreads across each layer, so don't stress if they're not perfect.
Serving and Variations
This cake is at its best when friends gather around it, watching each other discover that honey pot. It pairs beautifully with late-harvest Riesling or a sparkling Moscato if you're keeping it celebratory. For a nut-free version, simply skip the almonds and add more edible flowers or a sprinkle of fleur de sel for texture. You can also experiment with honey varieties—orange blossom honey brings brightness, lavender honey adds something unexpected and slightly herbaceous.
- Serve this cake at room temperature, not cold, so every flavor sings.
- If you're making it a day ahead, keep it loosely covered and assemble the final garnish right before serving.
- Consider offering small spoons or forks specifically for dipping into that central honey pot—it's a detail that makes people smile.
 Pin It
 This cake became my answer to the question 'what do you make when you want people to feel special?' It's not just dessert; it's a small, edible ceremony that says you were worth the effort. Every time I make it, someone leans over and whispers that they've never seen anything like it, and that moment—that genuine surprise and delight—is exactly why this recipe matters to me.
Recipe FAQs
- → What type of honey works best for the central pot?
High-quality liquid honeys like wildflower or acacia are ideal for the pot, offering smooth texture and fragrant floral notes.
- → Can the cake be made nut-free?
Yes, simply omit the toasted almonds garnish to accommodate nut allergies without compromising flavor.
- → How do you create the hole for the honey pot?
After stacking the layers, use a 3-inch round cutter to carefully cut a circular hole in the center before placing the honey pot.
- → What is the best way to serve this dessert?
Serve slices alongside the central honey pot so guests can dip each bite for added sweetness and moisture.
- → Are there alternative honeys suggested for unique flavor twists?
Try orange blossom or lavender honey varieties to introduce delicate floral nuances complementing the cake’s flavors.