 Pin It
 There’s something oddly satisfying about layering sweets, and I stumbled into making these Gummy Bear Lemonade Jelly Cups after a very ambitious attempt to entertain a group of cousins on a scorchingly hot afternoon. Somewhere between the laughter and diversionary tactics to keep them out of the kitchen, idea struck: why not drop their favorite candies into wobbly lemonade jelly and call it dessert& It promised instant fun—and the colors alone made the kitchen feel like a party.
Last summer, I set these jelly cups in my coldest fridge shelf just as an impromptu playlist war broke out in the living room. When I returned a couple hours later, the gummy bears had settled in whimsical patterns and the cups had become the stars of the snack table—and my cousin still brings up their ‘museum worthy’ vibe.
Ingredients
- Fresh lemon juice: Real lemons deliver that bright, mouthwatering tang—I always roll them under my palm before juicing for maximum yield.
- Water: Acts as a gentle carrier for both the gelatin and the lemonade's flavor, so make sure yours is cold and filtered if possible.
- Granulated sugar: Sweetness balances the sharp lemon without making the cups cloying (taste the mixture so you can tweak to your liking).
- Unflavored gelatin powder: Gives each cup its signature bounce; let it bloom properly or you'll end up with rubbery spots.
- Lemon zest: Adds bright aroma and flecks of yellow sunshine, but avoid grating too deep—only the rind, not the bitter white pith.
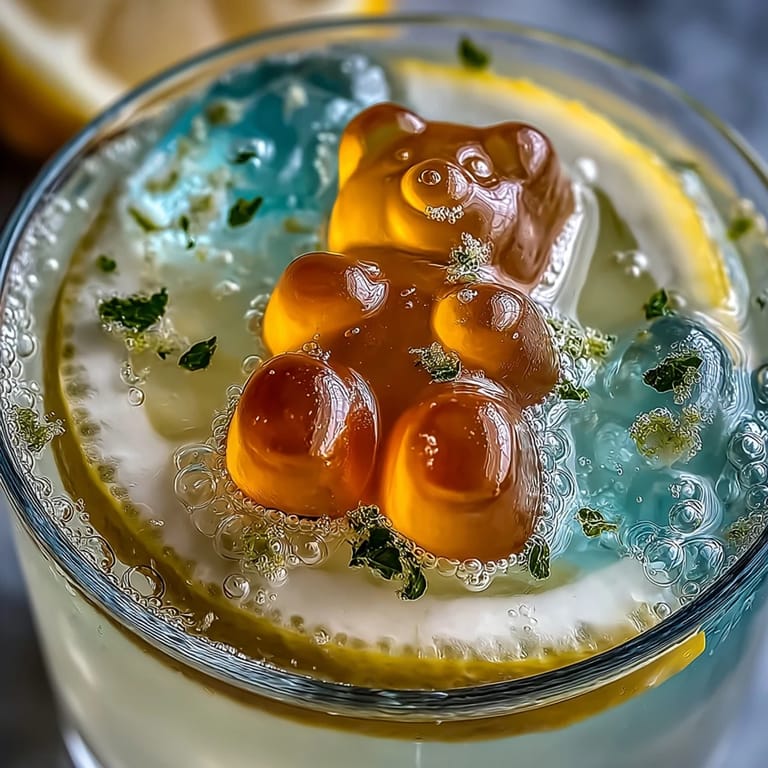
- Assorted gummy bears: The real showstoppers; I lean toward the classic fruit mix, though sour or cola bears shake things up.
- Fresh mint leaves (optional): Just one on top perfumes the whole cup and looks elegant.
- Lemon slices (optional): Thin wheels perk up the color and shout ‘lemonade stand’ at first glance.
Tired of Takeout? 🥡
Get 10 meals you can make faster than delivery arrives. Seriously.
One email. No spam. Unsubscribe anytime.
Instructions
- Bloom the Gelatin:
- In a small saucepan, combine lemon juice, water, and sugar, then sprinkle gelatin evenly across the surface—pause for two minutes as it softens and looks slightly wrinkled.
- Dissolve the Mixture:
- Warm gently over medium heat, whisking often, until the kitchen fills with a subtle citrus aroma and both gelatin and sugar dissolve (never let it boil&).
- Compose the Gummy Base:
- Tumble 10 to 15 gummy bears into each clear serving cup—the randomness makes every bite a surprise.
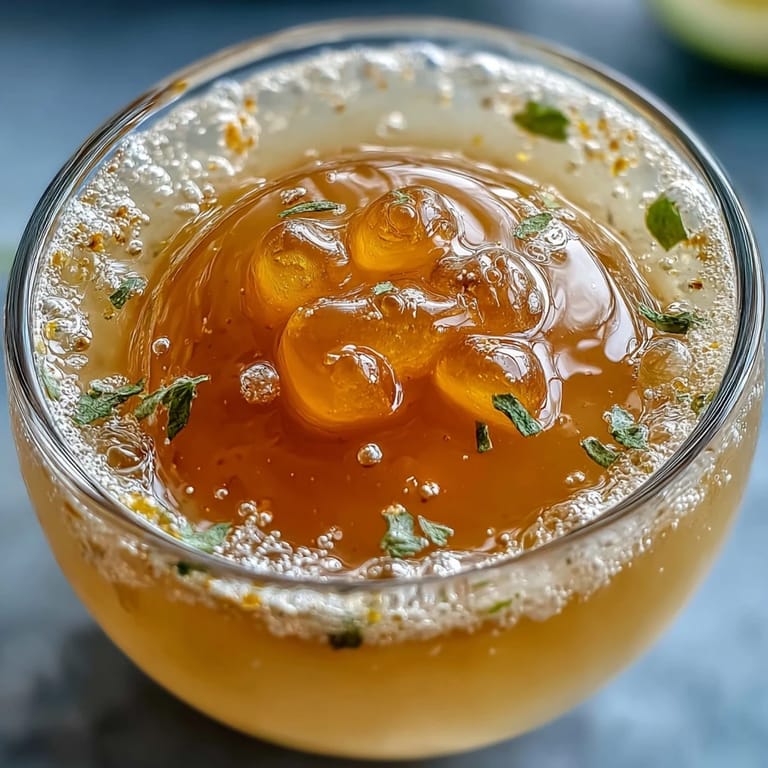
- Pour and Set:
- Ladle the warm lemonade mixture over the gummies until cups are almost full, then pause to admire the clouds of steam and bright colors swirling briefly together.
- Chill Until Firm:
- Let cool on the counter for 10 minutes (they’ll sigh with relief out of the heat), then refrigerate for two hours or until the tops jiggle but don’t stick to your finger.
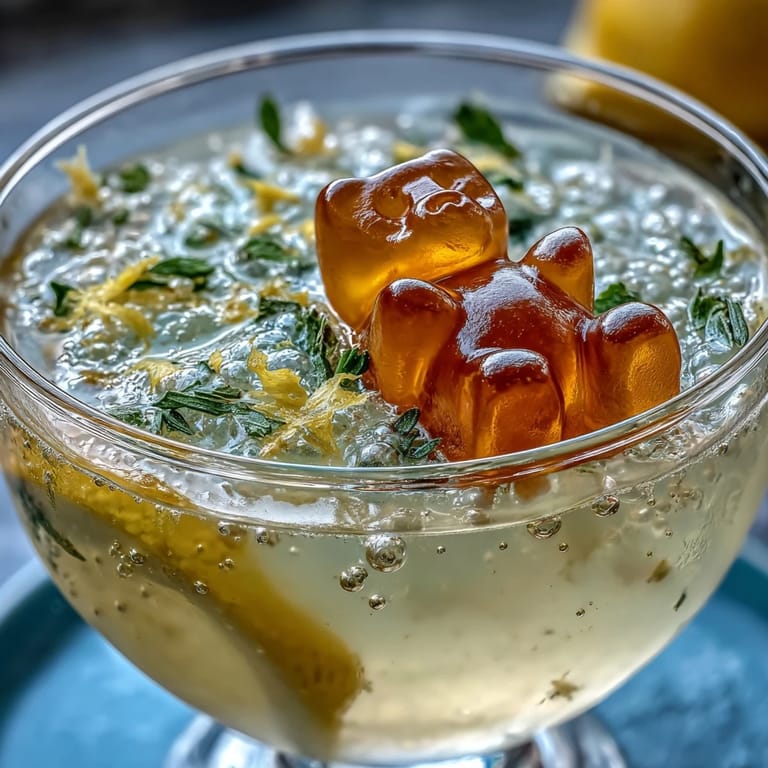
- Decorate to Finish:
- Top each cup with a sprig of fresh mint or a slice of lemon just before serving; their freshness and scent turn the treat into pure summer.
 Pin It
 I’ll never forget the half-surprised cheer when someone dug up a blue gummy bear from the bottom, waving it like a tiny, flavored trophy. Suddenly, these jelly cups became a standing order for any backyard event we hosted.
Making It for a Crowd
After the first successful batch, I scaled the recipe up for a big birthday picnic—doubling the ingredients and recruiting kids for gummy bear placement was part of the party itself& If you’re prepping for a crowd, set out a ‘build your own’ station so everyone can create their own color combinations.
Keep It Veggie-Friendly (If Needed)
If you want to keep things fully vegetarian, swap the gelatin for agar-agar powder—just follow the package ratio and dissolve it in the lemon mixture with care. Bonus: agar sets a bit faster, and the texture is firmer (different, but still joyful to eat).
Flavor Twist Secrets
Tinkerers in the kitchen can experiment by subbing half the lemon juice for pink grapefruit or adding a touch of fresh grated ginger for zip—tart and fruity combinations never fail to excite. Don’t be surprised if you end up trying punchy flavors just for fun.
- Tuck in extra sour gummy bears for a lip-tickling snack.
- Make a grown-up batch with a splash of vodka for parties.
- Let the kids decorate with extra gummies just before serving for more color (and excitement).
 Pin It
 Even if you only make these once, you’ll remember the bright faces (and sticky fingers) around the table. They’re a reminder that dessert can be as fun to build as it is to eat.
Recipe FAQs
- → How long does the lemon gelatin need to set?
Chill the filled cups for at least 2 hours or until firm; smaller servings may set in 90–120 minutes. Ensure the gelatin has fully cooled before refrigerating to avoid condensation.
- → Can I make these vegetarian?
Yes. Replace gelatin with agar-agar using the package ratio for firm gels. Agar requires boiling to dissolve and may produce a slightly different, firmer texture than gelatin.
- → Will the gummy bears melt or lose shape?
Gummy bears soften slightly when exposed to warm liquid. To preserve their shape, arrange them in cups and pour the mixture once it’s warm but not steaming; chilling quickly helps them retain color and form.
- → Any tips for presentation?
Use clear cups to showcase layers, place colorful gummy bears at the bottom, add finely grated lemon zest on top, and finish with a mint sprig and a thin lemon slice for contrast.
- → Can I add alcohol to the mix?
Yes—replace up to 1/4 cup of the water with a clear spirit like vodka for an adult version. Note that alcohol can affect setting, so test a small batch first and avoid excess.
- → How long can these be stored?
Store covered in the refrigerator for up to 3 days. Do not freeze, as freezing will alter the gel texture. Check gummy bear packaging for allergen warnings before serving.